
Sometimes the KISS approach is the best way to go.
When I first bought this fabric a couple of years ago, I had a peplum style top in mind. I’m not sure why, maybe an inspiration photo prompted the idea. But whatever it was, the idea stuck. So when I put the fabric on the cutting table, I started to problem solve how I could make a peplum and have a scalloped edge at the bottom. Pleats, easier to work with than darts and less hassle than splicing the lace for a couture dart.
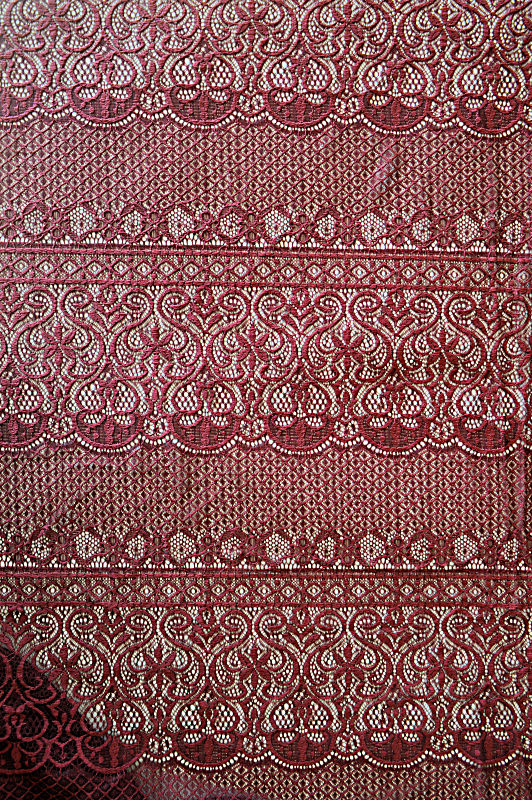
Next came checking the pattern repeat of the lace. I wanted the edge of the scallop section at the hem, and just above the bustline so the densest part of the fabric was over the bust. The plan was to partially line the top below the scallop line so that the shoulders were more see-though, but I had coverage where I needed it.

At this point I sketched out how it might look, with the pattern repeat to scale. If you look at the waistline of the first sketch, you can see how there is a jog in the repeat that I didn’t really line. The next option was to try a wrap style, with the scallops running on the edges. This might work, but it would need to be fully lined. The long sleeves look a little busy so I’ll stitch with short sleeves.
So I ditched the idea of having a waist seam. The narrow stripe in the fabric gave me the idea for going with a boat neck pattern. I love the mustard stripe T that I had made recently, so I fished that pattern out and fiddled around with how the pattern would work with it. It did and it didn’t.
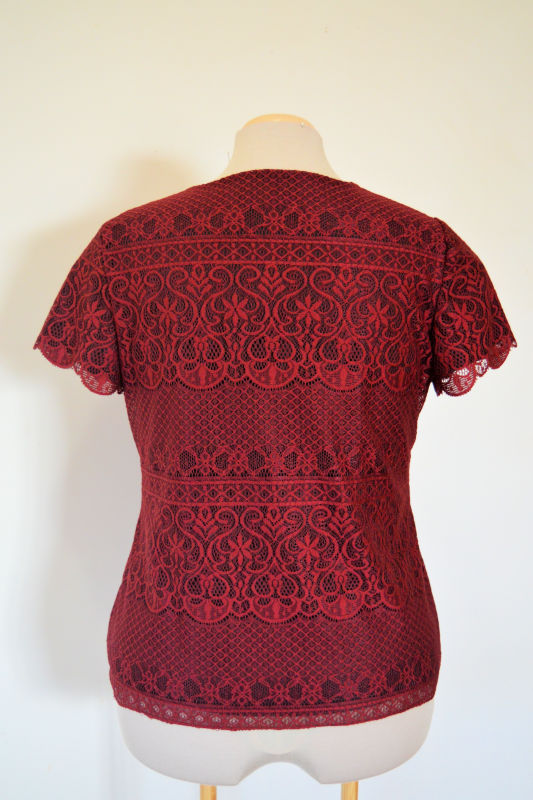
New day, new approach – KISS (keep it simple stupid), using my semi-fitted T-shirt pattern. I’ve set the scallops to where I need them just above the bustline and as low as I could go to have the stripe run below the lowest part of the neckline. At the hemline, it finishes with that same stripe. The sleeves to match at the stripe on the front and back shoulder, and end with the scallops. To avoid having to deal with a neck binding, it is fully lined, including the sleeves. All the seam are hidden between the lace and the lining. The lining is free hanging and finishes just above the border.
Simple, effective and took less than an hour to put cut and together. I had a chuckle over how much time I spent in the planning, but I’m quietly smug about where it ended up. Sometimes less IS more 🙂


Sewing Project Score card


absolutely lovely!
LikeLike
Thanks Ruthie 🙂
LikeLike
It is lovely! Proves though that simple isn’t always easy… glad you took the time to mull it over before cutting. I am learning to slow down and consider the end garment. You are a great teacher, so thank you.
LikeLike
I’m very prone to ruining good fabric so I really need to take make myself slow down and think things through. So glad you found the post helpful.
LikeLike
You have reason to feel smug with this lovely top. It doesn’t matter how convoluted the journey if you end up where you wanted to go. The simplicity of this allows the fabric to be front and center, and that’s what makes it. Good thinking about lining it as well. I love it.
LikeLike
Thanks Becky. It got it’s first outing to a chamber orchestra concert. It was a great night.
LikeLike
I have a silver lace that I keep wanting to make into a top and keep getting hampered by the up front work 🙂
This is really beautiful and I just love the color.
LikeLike
Thanks, I love the colour too. Your silver lace sounds wonderful. Look forward to seeing it sometime soon.
LikeLike
Great color and fabric, not often that you see burgundy lace. Love the style too.
LikeLike
Thanks!
LikeLike
this top is BEAUTIFUL!! Great work in all that matching plus it looks great with the lining. Want.
LikeLike
Aww thank-you! Perhaps I can trade you for that gorgeous shirt you made recently with the bird print????
LikeLike