
For the last 10 years I’ve been wanting to make a Goretex jacket. The RTW one I use for skiing and hiking was designed for someone much taller than I am. Making my own would mean I get a good fit plus have control over pocket styles and added extras like pit zips and detachable hoods. So what has been stopping me all this time? The main issue is can’t really decide on the design I want to make. Some of the slim-fit RTW climbing jackets looks so nice, but maybe not so versatile. The other issue is the paralysis of not wanting to cut into expensive fabric.
Last winter, I finally made my prototype. As luck would have it, I came across some seconds fabric at our local mill – a lightweight charcoal Goretex brought in for a military contract, perfectly functional but rejected because the inside coating had been reworked and the colour was a bit patchy. All the seconds are priced at $4/m so it was a bargain I couldn’t refuse. I decided to make a test jacket that I could wear for hack work ( eg digging trenches in a storm out in the paddocks) and keep my other jacket purely for hiking/skiing.
Deciding on a design
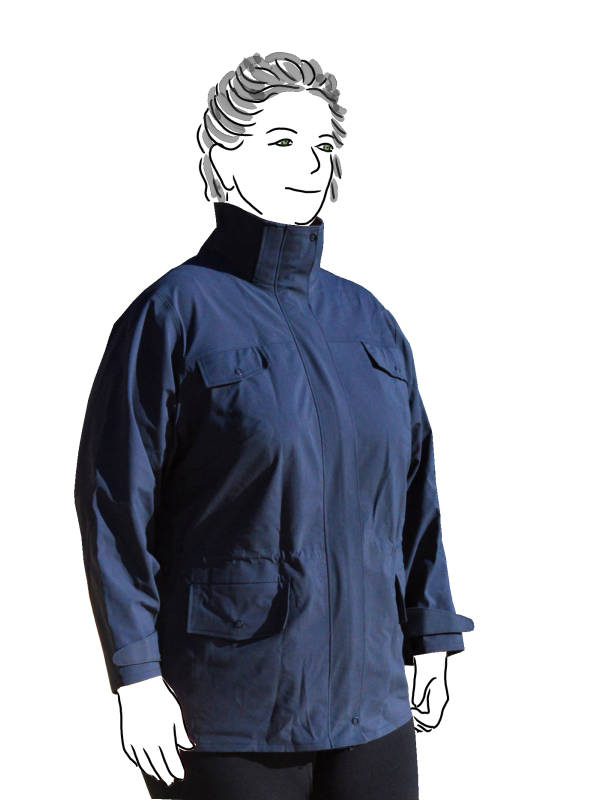
I did a bit of snoop shopping in the outdoor stores in Melbourne and rapidly came to the conclusion that the simpler designs were actually the most practical. I decided used Lekala 5917 as the base for the pattern.. It had a nice high collar, zipper with placket and drawstring waist. I used the pattern preview to check that I would have enough room to wear a thick jumper underneath. I had a few design changes to help with waterproofing and for a “minimalist” look.
Design changes:
- seam-sealed all seams using 3 layer Melco tape.
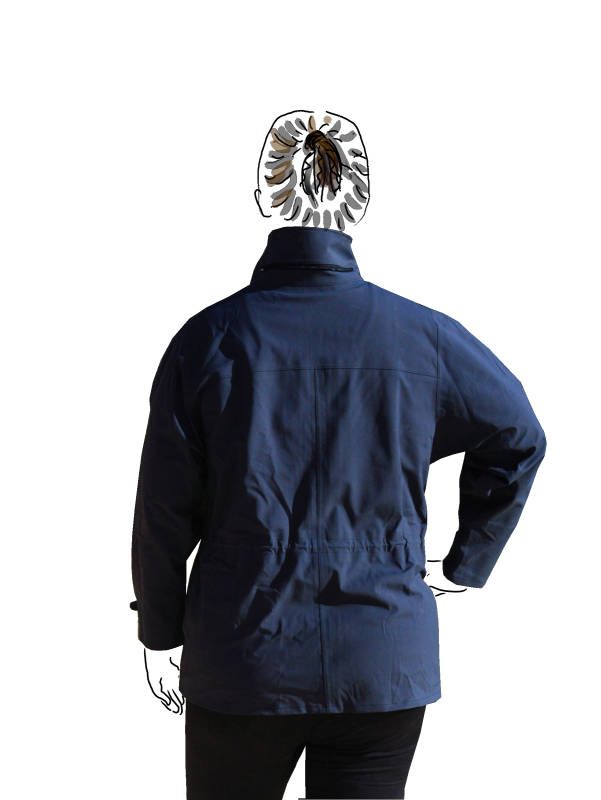
- created a yoke to remove the shoulder seam
- added internal zipper shield & added fabric tab stops to the top of zipper ( I hate having a zipper rubbing on my neck)
- changed the pockets to welt pockets with the flap, keeping a good overlap between the flap and welt edges to prevent water dripping in.
- moved drawstring grommets put on the inside and used toggles to tie them off
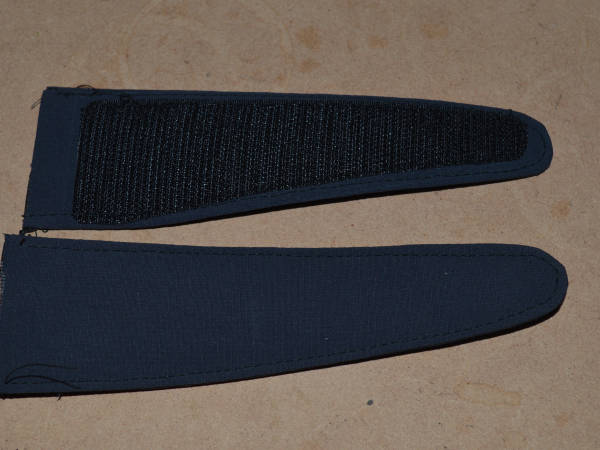
- added velcro cuff straps to tighten the sleeve cuffs
- considered attaching a removable thermal lining but decided against it.
- collar adjustments to allow for a removable hood. Hood will zip on at the back of the neck, with the front vecro-ing under tabs on the collar. I still need to draft the hood. A job for this winter!


Tips on sewing & sealing
The aim is not to put holes in the fabric which will ruin the waterproofing. Paper clips were used instead of pins to hold the pieces together. The seams were stitched with a 4mm length, folded up to prevent water from being trapped in the seam, and top-stitched. The seam allowances were trimmed 3-4mm from the topstitching and the seam-sealing tape was applied, before going onto the next seam. The taping provides waterproofing and some extra strength to the stitching.
The seam sealing is a slow process and is best done with a mini-iron. You need enough heat to melt the glue on the tape without burning it so do some testing on scraps first. Check that the tape has fully fused by trying to pull it apart. You also need to make sure the iron doesn’t go onto the inside of the fabric as it will affect the coating. I used a piece of timber with a half-circle profile under the fabric when I was using the iron. This supported the fabric and helped keep the iron on the tape and away from the fabric. Use a pressing (rather than side to side) motion when setting the tape as it can stretch with the heat and leave permanent puckers when it cools.
If you don’t have a mini-iron, tack the tape down in a few places and then use a pressing cloth or backing paper over the tape to finish the rest of the seam. The tacking will help keep the tape aligned.
Give yourself plenty of time. It is a still process and a small mistake made in a hurry can ruin the whole jacket. (Trust me, I almost melted a couple of teeth on the zipper when sealing the placket!!!).

Performance
The jacket weighed in a 440g, compared to the 780g of my other jacket. Nice and lightweight.
The sleeves look twisted in the photo, but this is due to how I pulled the cuff tabs up. The sleeve actually hangs fine. Also the inside shot is very crinkly – it had just been unrolled after spending months rolled up in a draw in the wardrobe.
I finished the jacket last winter just in time for a heavy rainstorm. I was outside digging trenches to divert the water and stayed dry. None of the seams leaked and the reworked fabric was perfectly water-tight. Sadly that was the last rain that we had for almost 9 months. The motivation to make the hood shrivelled along with the grass. Lately the rain is back, the grass is growing and once again I’m thinking about that hood … and possibly pull-on rain pants. Oh – and DH has just asked for a new set of gaiters and overmits 🙂
At a Glance:
| Pattern | Lekala 5917 with changes |
| Weight | 440g |
| Fabric | lightweight 3-ply Goretex. Lots of seam tape |
| Difficulty | 4. Construction is easy but time-consuming to apply seam-seal tape |
| End Result | 4 – Sleeves are a little short but the rest is great. Waterproof! |
| Cost | approx AU$60 – fabric $8, seam-seal tape – $40, hardware $5 |

Wow! Such a great jacket. Great work!
LikeLike
Your jacket looks amazing and thank you for all the details. Oh now can’t wait for the hood, a must have for your jacket.
I’ve had the 3ply gortex since 2011 and need to make my jacket for dog walking in the rain as the ex ski patrol jacket is just a very bad look.
LikeLike
I had a good think about the hood last night and need to draft up a sample.
Maybe we could do a Goretex sew along together? I think I know what I want the final one to look like… mostly…. sort-of ….maybe….. 😉
LikeLike
Oh just saw this as I am trying to see where you purchased your seam seal tape from.
I am keen for a sew along if you want as I plan to make up a jacket with Dintex or Gortex this year so if you are still interested.
LikeLike
I got the 3-lyr tape from Settle Fabrics (USA) and the 2 layer tape from M-recht in Melb (which is no longer available). The tape ends up being quite expensive ( $3-4/m of the 3-layer and about half that for the 2 lyr) and it is surprising how many metres you will need. I’ve seen both tapes advertised on Ebay recently by Aussie sellers (most actually ship from China, so I’m not sure how ‘local’ these suppliers actually are). Another alternative, if you are lining the jacket, is to use the glue. Most camping shops will have it. One tube ($10-15) covers 10-12m of double stitched seams. (Guess how I know??)
I’d be interested in a sew-along, but won’t get a chance this year. Perhaps in the Autumn?? It has been so dry here that we are thinking more about naked rain-dances rather than wet weather gear 😉
LikeLike
Thank you for getting back to me. I have also seen the Aussie sellers but a bit dubious as to quality. I am not planning on lining the jackets and even if the tape is expensive at least I have a good quality jacket at the end. Thankfully I’ve got a sewing friend arriving from the US end of December and she has offered to bring anything I want so looks like I will be contacting Seattle Fabrics.
Autumn should work for me so let’s see how we go. I just wish I could have sent some of our deluge on Wednesday down to you.
LikeLike