
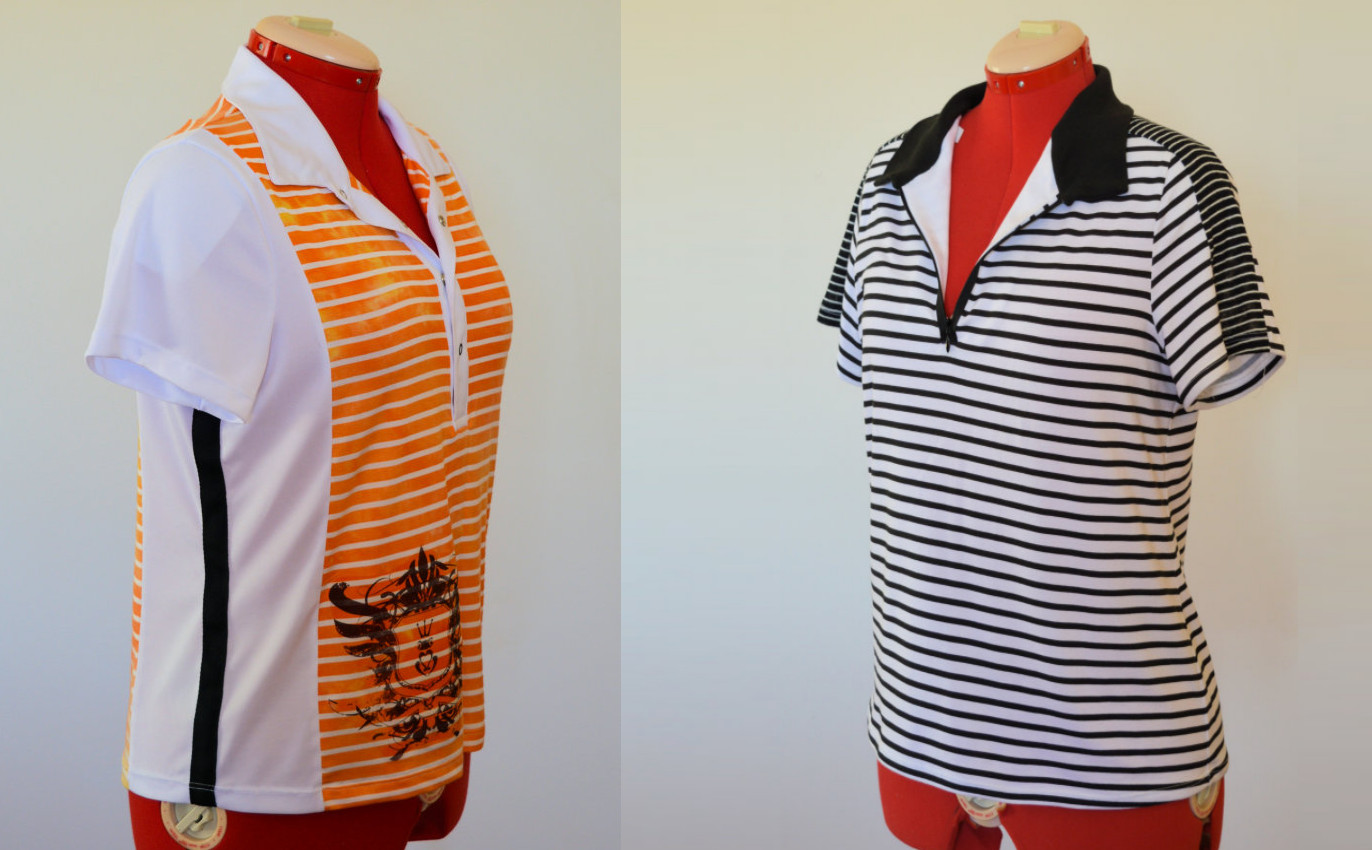
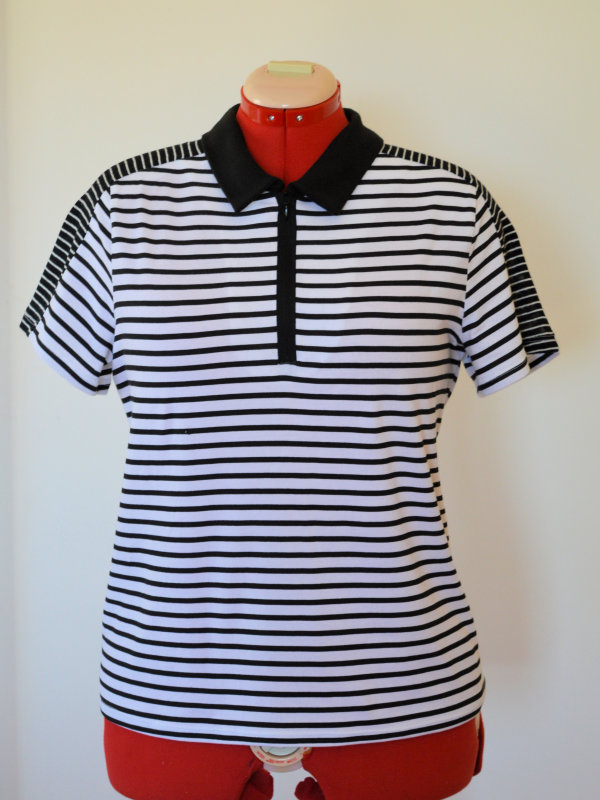
It seams that the theme of the month is stripes! I’ve been having a bit of fun creating ‘designer knock-off’ polo shirts. Here are the finished shirts…
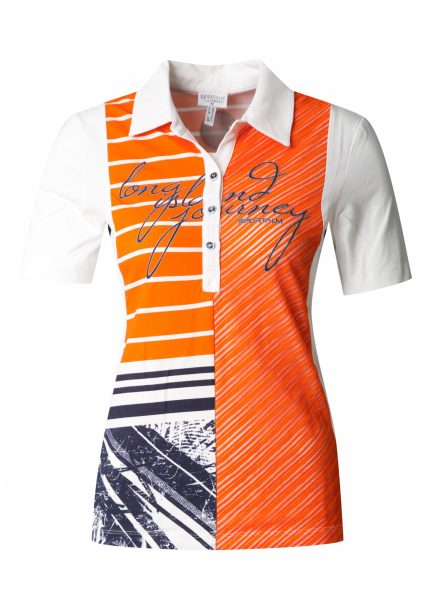
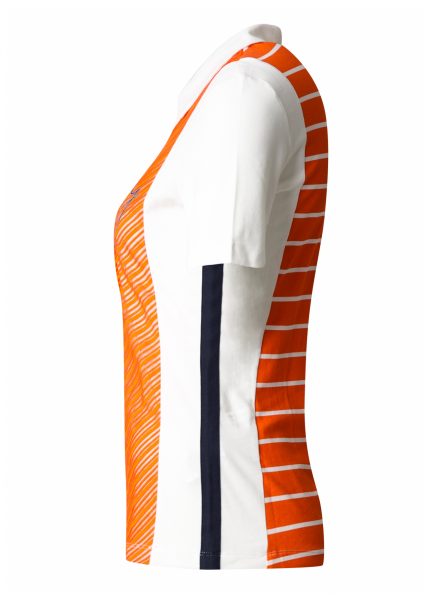
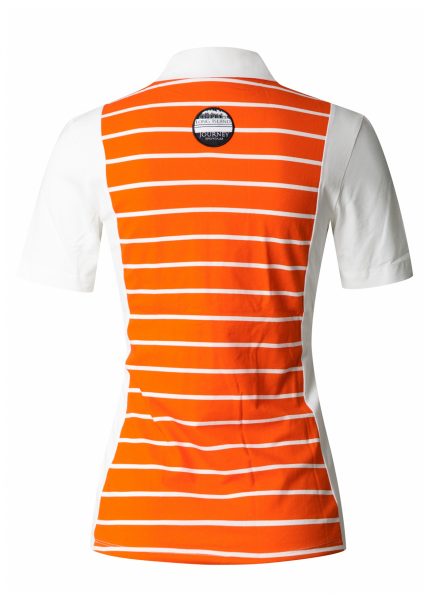
The inspiration
I had bookmarked these two polo tops by Sportalm to knock-off. Both are based on a colour-blocked polo shirt.

The fabrics
This is a few of the fabrics which I picked out for the up-coming projects. The three on the left are cotton, white fabric is a poly sports pique, the orange is rayon and the cross-hatch is a nylon-lycra. There is also a pale grey stripe cotton/lycra fabric which was too shy to be in the photo ( ie I misplaced it).

The pattern
I’m using Kwiksew 3532. It is for a close fitting polo with variations on sleeve length and two different placket/collar combinations. The first has placket bands with a convertible collar – perfect for the orange polo. The second has a plain collar with a shorter self-facing placket.
The pattern is quite close fitting but I’ve used my TNT t-shirt pattern to change the side seams to be a looser fit.
Black polo pattern changes
The striking thing about this polo is the contrast bad along the shoulder and sleeve. This was a fairly easy drafting change by taking 4cm off either side of the shoulder seam and extending it down into the sleeve.
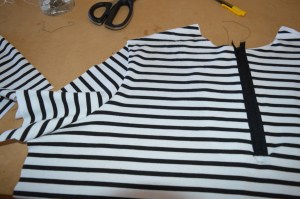
This meant that the sleeve is attached differently. The ‘wing’ sections are first sewn to the armhole (photo1). Then the band is attached to the front shoulder/sleeve seam (photo 2). Then the other side is sewn to the back shoulder/sleeve.
The zip was a bit more fiddly as I’ve used a heavy weight invisible zipper and sown it on like an exposed zipper. There is a hand stitched facing so a plain white fabric shows when the zipper is opened. The collar used was view B and made using a cotton ribbing.


Orange polo pattern changes
For this version I used the collar and placket for view A. The white knit is very stretchy but the interfacing made it easy to sew the placket and collar. I’ve used snaps instead of buttons.
The vertical seams are further to the side than a princess seam, so from the front, you only see a sliver of the white panel. The diagram below shows the rough placement.
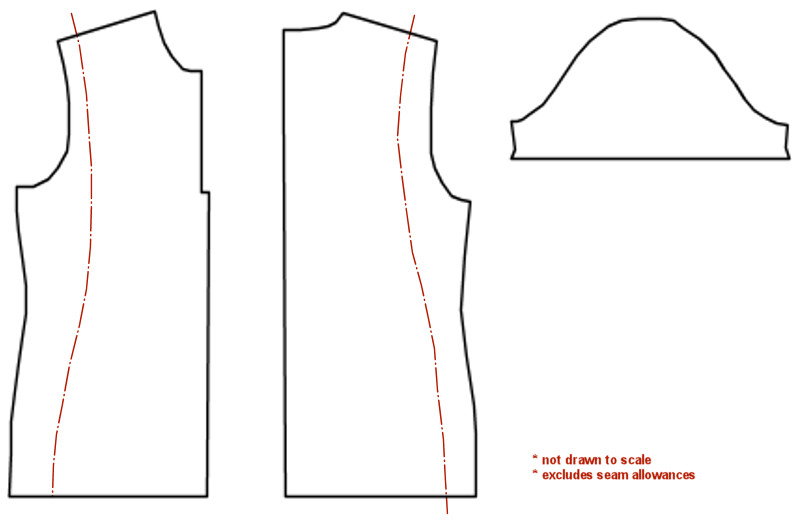
For the black stripe, I’ve used pre-washed cotton twill. Since it is sewn over the side seam, the sleeve must be set in after the side seam is finished.

Initially, I wasn’t going to add any graphics to the front, but the shirt seemed to need it. I’ve used an inkjet iron-on transfer, combining two free graphics. I was a bit worried that the transfer wouldn’t work on the rayon because of the heat needed to transfer it. I picked a grungy graphic just in case parts of the image didn’t transfer. After a couple of samples, I figured out that I needed to move the iron more often and build up the heat. Worked fine!
The graphic on the back is a smaller version of the one on front. Just printed onto a patch and appliquéd on.


Wow!! These are impressive
LikeLike
I second the first commenter. WOW!
LikeLike
Thanks, but I think the original designer deserves most of the credit ::-)
LikeLike
Credit to the designer, however your ability to take it and make very impressive versions for yourself is WOW.
LikeLike