
Today’s project is a replacement for the spray skirt for the TK1. The current skirt came with the kayak when I bought it some 20 years ago. It was second hand then and already a veteran of a few Murray Marathons. It has served it’s owners well but has now mostly delaminated and parts of the waist casing have split.


Making the pattern
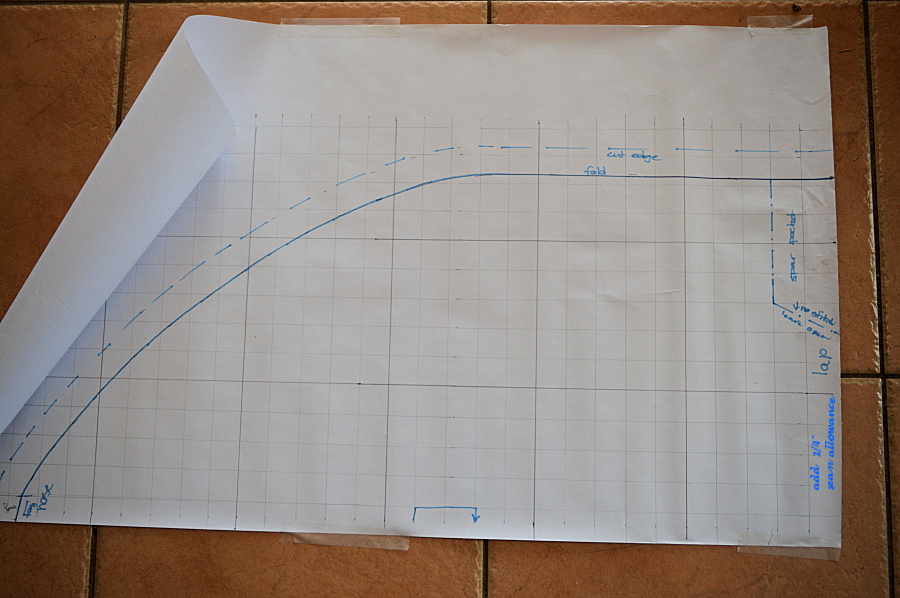
The pattern has two parts – the deck and the tower. The tower is in two pieces (seams at the centre front and centre back) . The deck is one piece. There is 1″ casing at the waist and around the base; loop at the front for quick release – although most times, if you tip this kayak, the deck comes off as you fall out. To make the pattern, I cut the elastic and ironed out the creases around the casing and then traced around the outlines.
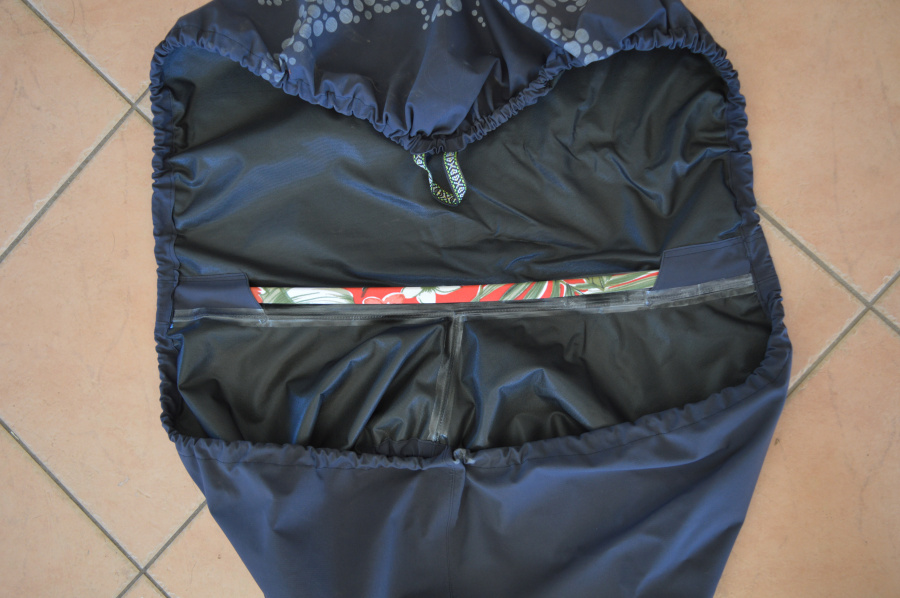
This is the pattern, with each square being 1″. There is a 1″ seam allowance for the casing and 1/4″ on the internal seams. The original skirt had reinforcing pieces on each side of the lap seam. I’ve changed this to a pocket that will hold a flexible spar. This should help to hold the lap seam up and shed water better.
Feel free to use the pattern ( and show me what you make). But remember it is for a TK1 and may need to be adjusted to suit a different cockpit.

Materials
- 1m of Goretex to make the skirt. Any WPB fabric will do, it was just what I had on hand and spare.
- 3.5m of 4mm shock cord
- 20cm webbing for the loop
- 1.5m seam seal tape or seam seal glue
- Optional – 50cm flexible plastic spar ( I used orange tongue); offcut of nylon lycra.
- Optional – artwork of your choice and fabric pens/paint. Test for water resistance first.
Total cost was less than $10, but I got the Goretex very cheap. Much cheaper than a bought one.
Artwork
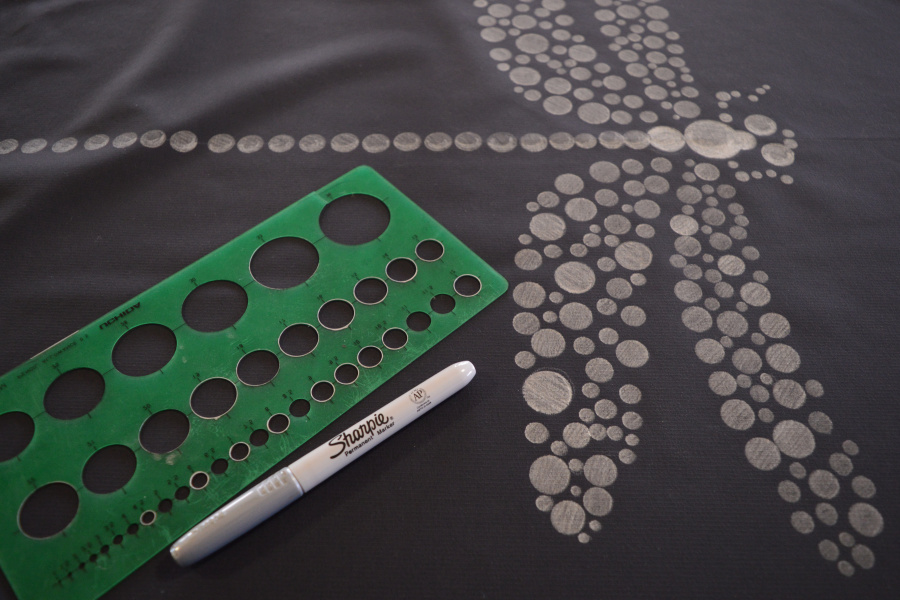
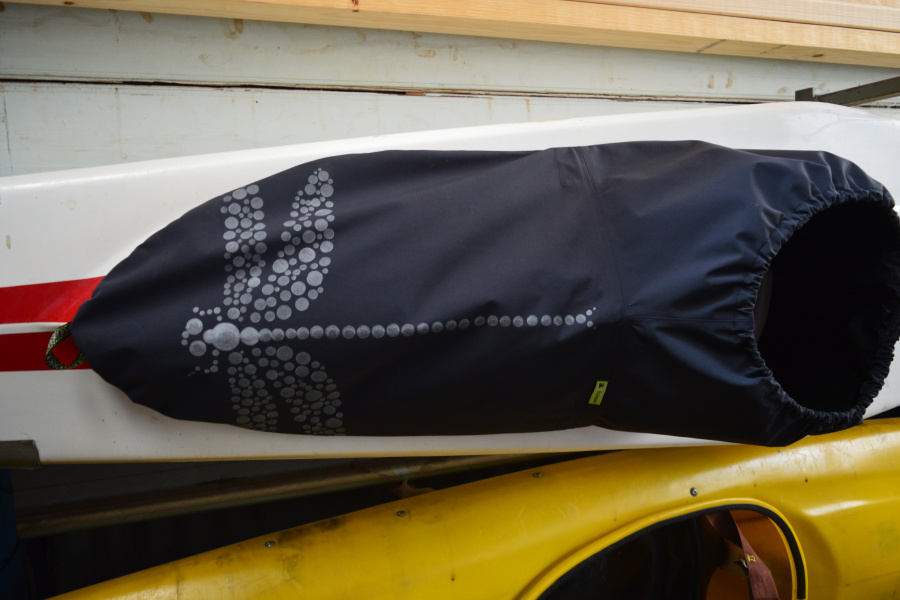
When I was doing some snoop shopping for spray skirts, I came across a deck for a white water kayak that had an octopus print on it. It looked really cool! So I gave DH the choice of about 10 different designs that I thought would look good on the deck section and told him to take his pick. He chose a dragonfly and wanted glow in the dark paint, but had to settle for silver instead. It was possible but I would have needed to make a stencil to use the glow spray paint – lots of little circles – ugggh. Much easier to use a marker with a template.

Construction
This is the easy bit.
- Hem the top edge of the pocket and attach it to the under side of the deck. Just the far long edge needs to be stitched to the deck as the other two will be caught in the lap seam or hem.
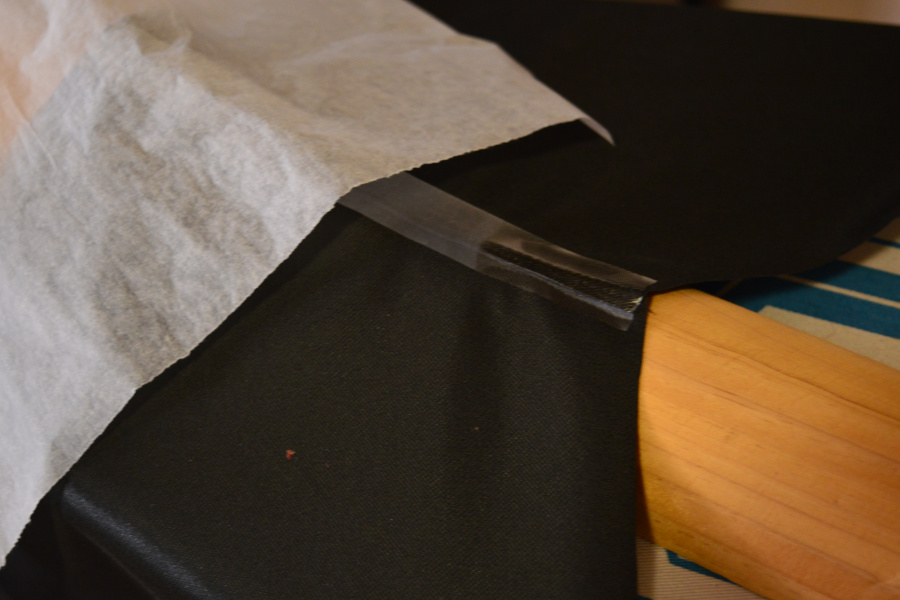
- Stitch the front seam of the tower ( 3 – 3.5mm stitch length). Topstitch and seam seal. When I apply the tape, I use a D shaped handrail offcut so the fabric drapes over it and the iron only comes into contact with a small section near the seam. I use a wool heat setting with a piece of baking paper between the iron and the tape to protect the fabric backing. You can just see enough through the paper to see when the tape fuses ( as in the right of the photo below). I find it easier to do 10cm sections at a time, making sure it has fused well and cooled a little before moving to the next section.

seam sealing setup 
sealed seams - Stitch the deck to the tower ( the lap seam). Fold the seam allowance up onto the tower side, topstitch and apply the seam tape. Since you can’t pin waterproof fabrics, use coated paper clips to hold the pieces together. Twist the paperclips off as you sew as I’ve found pulling them off can sometimes scratch the fabric backing.

paper clips instead of pins - Stitch the back seam of the tower. Topstitch and seal
- Stitch the front loop to the top face of the nose of the deck within the seam allowance. The ends should be facing forward and the loop resting on the deck. I’ve used two rows of zig-zag (3mm wide, 2mm long) to for reinforcement.
- Turn the 1″ hems for the casing and press lightly, using the baking paper to protect the fabric. Stitch the casing 3/4″ from the fold and leaving a 2″ gap at the back to feed the shock cord through.
- For the spar, we’ve used a piece of orange tongue plastic ( the stuff that is used for the tongue in particle board sheets) as this is what DH had in the shed. Alternatives could be nylon kite spars, aluminium strip, anything that has a firm flex. The edges were rounded so the corners won’t wear a hole though the fabric. The plastic was rough in spots so I made and a tube of nylon lycra to cover it and protect the Goretex.

- Feed the shock cord through and adjust the waist and deck lengths to suit. The ends of the shock cord were sealed with a flame. On the original, the cord was knotted. I asked DH to adjust the cords to the right lengths and they came back wired closed with a shrink wrap cover.

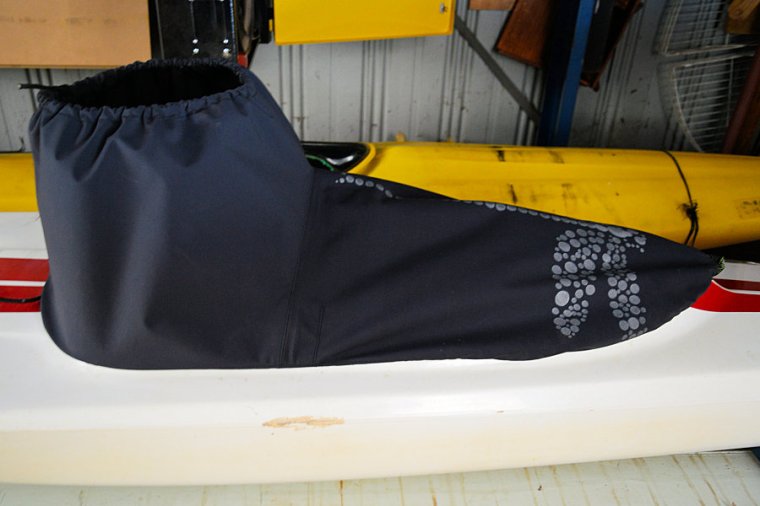
not very flattering worn like this - Last but not least ….Go paddling 🙂


The finished article

Very impressive and love the dragonfly.
LikeLike
Thanks 🙂
LikeLike
Great design! Very clever.. i’m impressed with this and last night’s shirts too.
LikeLike