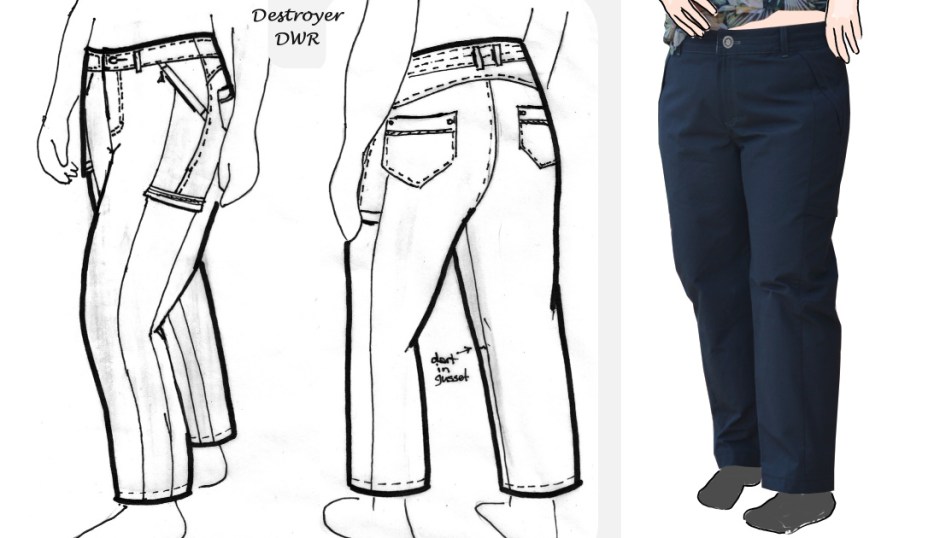
My next knock-off is the Kuhl Destroyer Pant. I think I was crazy to try to make these pants, but life is boring without a bit of a challenge? Drafting the pattern turned out to be the ‘easy’ bit. The biggest headache was working out how to sew the sides as they have a normal side seam from the waistband to below the hip, then it changes to a side panel starting with a zippered pocket with flap. Which seam to sewn first?

But before we get into that, lets talk about features. I plan to use these as a water-resistant hiking pant / overpant. The fabric is a DWR nylon that I got as a sample from our local fabric mill just before the mill shop closed earlier in the year. It only cost a gold coin ( just $2) but I wanted to do something special with it because I’ll no longer have access to such a good resource. Sadly the local woollen mill, and its shop, closed last week. Last time I was there I picked up a cone of cashmere yarn – so I’ll have to make something special from that too.
I digress. Back to the pants…
- Main features –
- wide waistband with internal drawstring
- relaxed fit – can were thermals underneath
- gusseted crotch
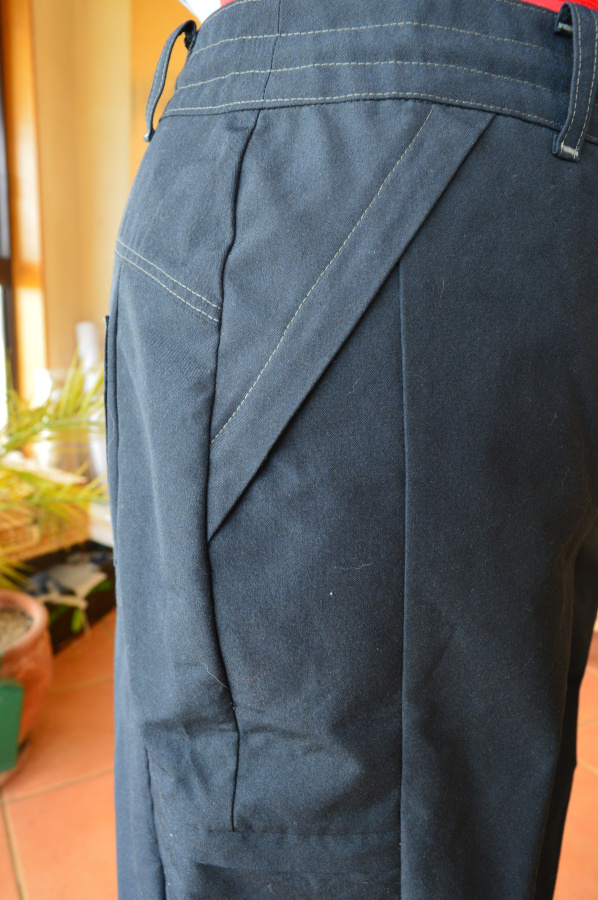
- 2 front slant pockets with waterproof zippers
- 2 side pockets with zipper and narrow flap
- back inverted yoke
- 2 back patch pockets
- DWR fabric
- contast stitching
- Signature embroidery
I’ve changed the zippered pockets to have storm flaps and just used normal zippers. The exposed, waterpoof zippers have a neat finish, but you only need them to be slightly open to get water into the pocket.
Drafting
I graded up from my pant sloper so that I would be able to wear a thermal layer under the pants for winter hiking or XC skiing. The waistband was made deeper to add in the draw string.
On the front and back, I drew in the style lines for the front slant pocket, back pocket, back yoke and side panel. To complete the back yoke, the waist dart was folded out. The side panels were joined into one piece below the side zipper.
Construction
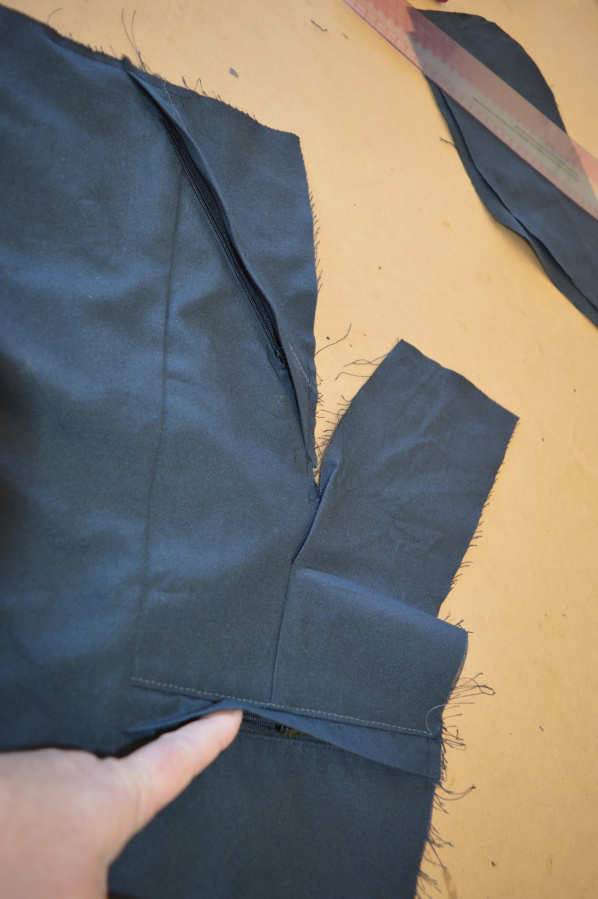
- Most of the construction is the same as any other pant. The conundrum was how sew the side panel.
- To stitch the regular side seam over the hip, the back yoke and front zippered pocket needed to be finished.
- To stitch the back yoke or front zippered pocket, the side panels need to be finished.
- To stitch the side panels, the side zipper needed to be finished.
- To stitch the side zipper, the regular side seam needed to be finished
- so we are back were we started!
The way I got around it was to sew part of the side seam, from just below the front pocket, down to the zipper seam.
Then I could sew on the lower part of the side panel/ side pocket.

Then sew the front to the side panel and construct the front pocket.
On the back, the patch pockets were sewn on. Then the crotch seam, the side panel seam and finally the yoke.
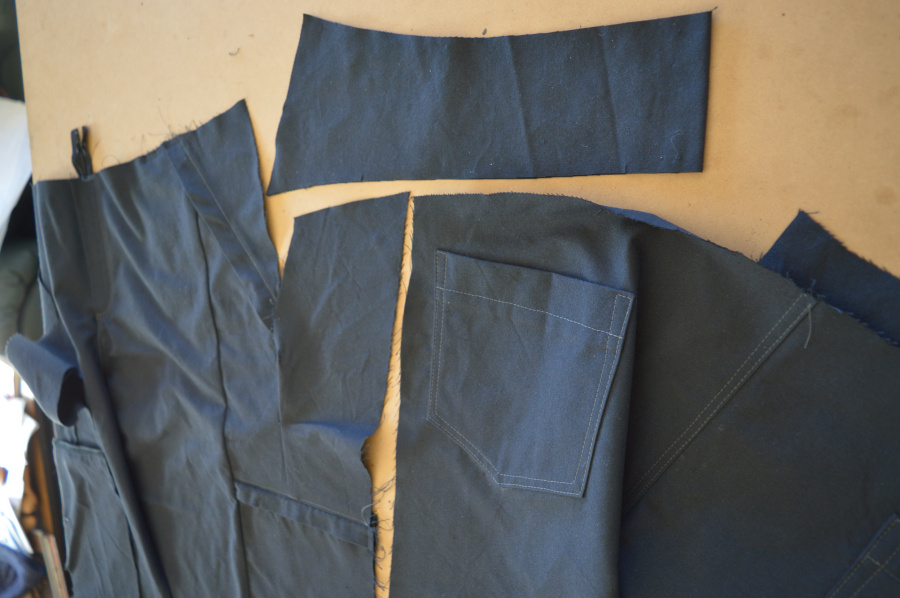
After that, the rest of the side seam could be sewn up to the waist. Aided by a lot of notches, it all lined up.
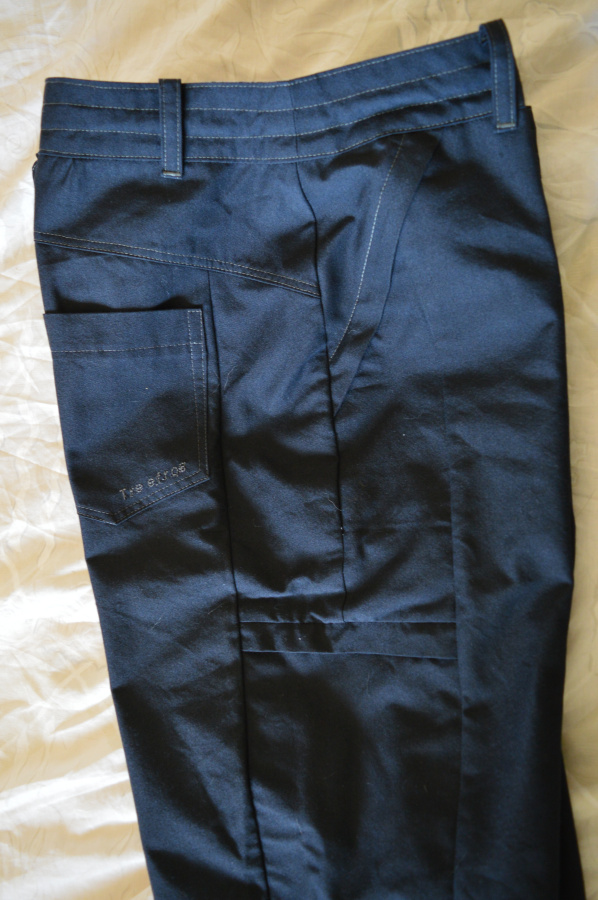
Finished pants


Those look like great pants!
LikeLike
What a great job! They look fabulous and like they’d be very practical as well 👌🏻
LikeLike
They look fabulous
LikeLike
Wow that is some engineering feat and they look fabulous.
LikeLike