
 Finally, I’m summoned up the courage to tackle this swimsuit (a.k.a. togs). It has only taken 4 years, but I think it will be worth the wait. The pattern is Merckwaerdigh BAD 24. I fell in love with it the first time I saw it. It is very distinctive and I was particularly attracted to the version with the stripes on the band. So, way back then, I found some funky striped fabric in black and white and had it shipped across the pond.
I also ordered the pattern along with some other lingerie supplies from ELingeriA. They sent me the Dutch language version instead on the English. Normally this isn’t a problem, having used KnipMode patterns for many years, I was getting to understand enough of what I was reading to be able to put things together. The pattern pieces have different markings for the notches so it is very easy to work out how the pieces go together. But on this one, I was having trouble working out where and when the elastic is applied. Each year, I’d get the pattern out and then get nervous about doing the elastic wrong. Summer would pass by and nothing would have happened.
So while the temperatures here are hovering around 40°C and my boardshorts just finished, I’m determined to get the project off the ground.
Choosing the fabric

The shortlisted fabrics are shown above. The grey/black striped fabric was the one I initially purchased to use for these togs. The cream/brown print was one I had earmarked to work in with my SWAP 2016 colours. There was also a third print (not shown) which had lime and olive colours.
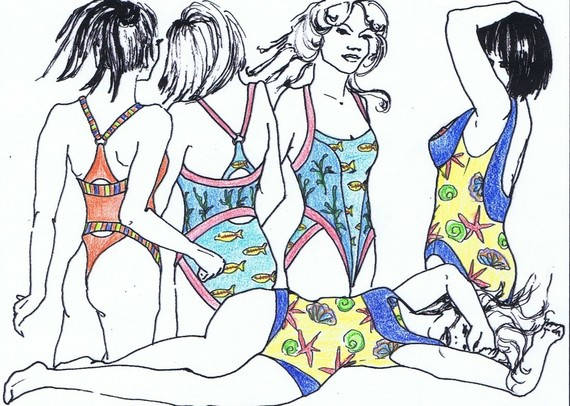
Before I started cutting, I decided to do a sketch-up of how they would look. I used tracing paper over the pattern’s sketches to draw, and got out my colouring pencils. The four options are shown below (clockwise from bottom right).

- Striped front and black body. This looks quite striking, and the effect I had in mind when I bought the fabric. However I’m a little nervous that the stripes on the legs may not be so slimming on a pear shaped figure
- Striped front and bands. I like the emphasis changes with th patterned front panel. Still not sure about the stripes on the legs. Plain bands there might be better.
- Brown print with black border. I hadn’t expected this to look as good. I think the black framing in the print will work well.
- Black with lime centre front. Just having the colour in the CF would work nicely. Using green on the bands looks good on the back, but on the front creates a big arrow. Colour ion the front panel and piping on the bands may be an option.
I’m glad I did the sketches as I don’t think my initial plan would have looked good on me. I’m going to go with the brown print with black bands. The striped centre front is always an option for later on down the track.
Cutting Out
My bust, waist and hip measurements line up very well with the pattern sizes but, as I’m short, I usually have to adjust the length. A quick check of the front pattern piece is close to that on the adjusted Kwik Sew pattern I had previously used. Hopefully I can take up any slack by adjusting the strap length.
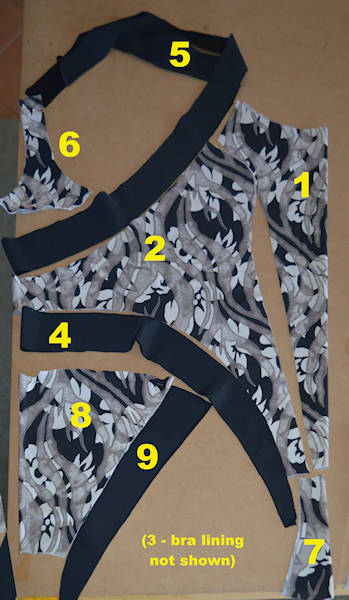
I bit the bullet and cut out the fabric. You can see in photo below how it all goes together ( click on the image to enlarge it). It is quite an ingenious design.
I nstructions
I had another try at reading the Dutch instructions. I did better than Google (although the machine translations are quite comical at times) but if the leg elastic is applied before or after the leg opening is closed ( ie bum piece sewn to the side/centre back piece)
So I sent an email to the designer hoping be able to get the English instructions. She got back to me very quickly with a PDF of the instructions and also with news that she is starting a project to have her patterns available as digital downloads. How awesome is that! The first, is a pair of boxer shorts (see her blog post here) which is available free to her newsletter followers for a month. The shorts have an optional pocket, designed to secret a key for at the beach or at a nightclub. The last page of the pattern has some sketches showing different options using laces, colour blocking, elastics and pockets. I’m going to try the pattern after I finish the togs. It could make a good tankini bottom.
Now, it is “all systems go” to sewing the togs!

What a lovely combination and such a clever way to get your sketches done! Also thanks for mentioning the (temporarely) free download pattern.
LikeLike
I love this – really, really love this.
LikeLike
I had difficulty adding seam allowances on the bands especially on the ones that tapered down. How did you do it and how much seam allowance did you add?
LikeLike
Sorry for the late reply. I added a 6mm seam allowance to match the elastic
LikeLike